In the world of iPhone photography, cropping photos can entirely transform your images. Not only does it help to enhance composition but also removes distracting elements, ensuring your photos look professional. But how exactly do you crop photos on your iPhone?
What is the iPhone crop ratio? In this SEO-optimized guide, we will discuss how to crop photos on your iPhone, explain the concept of cropping ratio, and share some professional-looking settings and editing hacks.
How to Crop Photos on iPhone
Cropping an image on your iPhone is a straightforward process. Here’s a step-by-step guide:
- Open the Photos App: Find the image you want to crop and tap to open it.
- Tap on Edit: This will open the editing tools at the bottom of your screen.
- Select the Crop Tool: Tap the crop icon in the lower right of the screen.
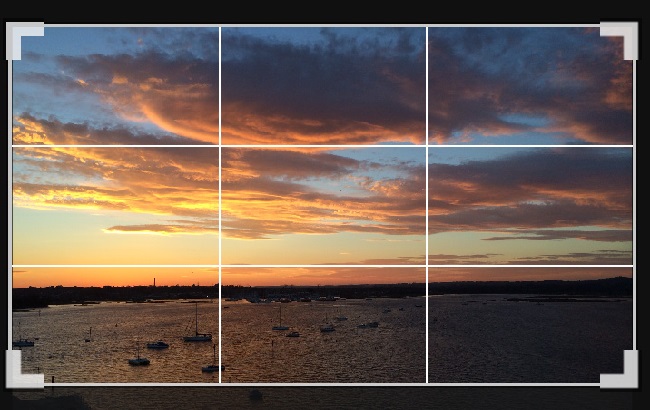
- Adjust the Frame: Drag the corners or sides of the grid tool to adjust your frame. You can also rotate your photo by using the dial right beneath your photo.
- Apply the Changes: Tap ‘Done’ to save your changes.
Understanding iPhone Crop Ratio
The iPhone crop ratio is simply a numerical expression defining the shape of your photo. It represents the relationship between the width and height of your image. A 1:1 ratio creates a perfect square, while a 4:3 ratio gives a rectangular shape, closer to the shape of your iPhone screen.
When cropping, consider the ratio that best complements your image’s content and the platform where it will be shared.
Professional-looking Cropping and Editing Hacks
- Follow the Rule of Thirds: This rule suggests that an image should be divided into nine equal parts by two equally spaced horizontal lines and two equally spaced vertical lines. The important compositional elements should be placed along these lines or their intersections.
- Choose the Right Crop Ratio: For a professional look, choose a crop ratio that best suits the platform where you’ll post the photo. For instance, Instagram prefers a 1:1 or 4:5 ratio, while 16:9 suits landscape photos for websites or YouTube thumbnails.
- Eliminate Distractions: Use the crop tool to remove any distracting elements in your photo’s background.
- Straighten Your Photo: If your photo is slightly skewed, use the ‘Straighten’ function beneath the image in the cropping menu.
Best Settings for Cropping Photos
The best cropping settings on your iPhone depend on your personal preference and where the photo will be displayed.
However, it’s recommended to maintain the aspect ratio when cropping photos to prevent distortion. Adjust the brightness, contrast, and saturation levels to your liking after cropping for the best results.
In conclusion
Cropping photos on your iPhone is a powerful tool that can elevate your photography skills to professional levels. The trick lies in understanding the basics of cropping and applying the right techniques and settings.
With practice and creativity, you’ll be able to create compelling and high-quality images using your iPhone.