When you put your USB into your laptop’s USB port, you may receive a notice on your screen that your USB device is not recognised, or your laptop may not respond at all. When this happens for no apparent cause, it can be extremely aggravating. But don’t worry; USB Ports Not Working is a common problem that can be quickly resolved.
How to Repair USB Ports Not Working
Let’s have a look at how to fix the USB ports on your laptop that aren’t working.
How to
Method 1: Restart your computer.
The majority of the time, a simple restart of your device will resolve small and significant issues. Simply disconnect your USB device from your laptop and restart it after a few minutes. Replace your USB drive in your laptop’s USB slot and see whether your problem has been resolved.
Congratulations if the problem has been solved; if not, continue on to the next answer.
Method 2: Check for damage to USB ports
Examine your laptop’s USB port to see if it has anything trapped in it. If you discover something, carefully remove it.
If the port appears to be in good condition, there should be no concerns within it. Now insert your USB drive into the port and move it up and down slightly. If it’s moving freely, there’s a problem with your post.
Method 3: Inspect for Device Issues
If you have a second laptop with you at the moment, plug your USB into that laptop’s USB port. If it works on the second laptop, there’s a problem with your USB. However, if it doesn’t operate in that port, there’s a problem with your USB device. If you don’t have another laptop but do have a USB, you can try putting it in there.
Method 4: Adjusting Power Management
When you are not using your USB controllers, your laptop includes a mechanism that turns them off to save power. When you need to work on it, it turns back on. However, Windows may be unable to power on your USB controller owing to a variety of issues.
To set the Power Management, follow the steps outlined below:
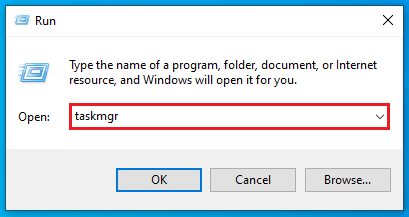
Step 1: To open your Run Box, look for the Windows key and the R key on your keyboard and press them both at the same time. Now a box will popup in which you must type devmgmt.msc and then click OK.
Step 2: Your screen will now display a drop-down menu. To expand it, first open the Device Manager window, then scroll down and double-click on the option Universal Serial Bus Controllers.
Step 3: A list will display, from which you must select USB Root Hub and then Properties from the drop-down menu.
Step 4: Now you must choose the Power Management tab. Then untick the box that says Allow the computer to turn off this device to save power, and then click OK.
Step 5: Repeat steps 3–4 for all USB devices connected to your USB Serial Bus Controllers.
After you’ve completed the procedures, check to see if your USB ports are working properly or not. Congratulations if the problem has been solved; if not, continue on to the next answer.
Method 5: Reinstall USB Drivers
To resolve the issue of a USB port that isn’t working, use Device Manager to delete all USB devices from your laptop. Then, after rebooting the device, Windows will reinstall them.
To do so, simply follow the instructions outlined below:
Step 1: First, you must summon your Run Box, which you can do by pressing the Windows key and the R key on your computer simultaneously. Now a box will popup in which you must type devmgmt.msc and then click OK.
Step 2: Your screen will now display a drop-down menu. To expand it, first open the Device Manager window, then scroll down and double-click on the option Universal Serial Bus Controllers.
Step 3: A list will appear, from which you must select USB Root Hub and then Uninstall device.
Step 4: Repeat steps 3–4 for all USB devices connected to your USB Serial Bus Controllers.
Step 5: Finally, restart your laptop to see if your problem has been resolved.
Method 6: Disable USB Selective Suspend
If the USB Ports Not Working problem persists, please contact us. USB Selective Suspend can now be turned off. It aids in preventing your device from wasting power when it isn’t required. It accomplishes this by putting some USB ports into a low-power mode. To resolve the problem, you can try disabling this functionality.
Step 1: Using the procedures described above, open the Search bar, and then type choose a power plan into the box. Then choose a power plan from the drop-down menu.
Step 2: Now choose an option. Change the plan parameters that are available directly after the plan choice you are now using.
Step 3: Select the option to adjust advanced power settings from the drop-down menu.
Step 4: Now you must double-click on both USB settings and USB selective suspects, one after the other.
Note: If you’re doing this on your laptop, you’ll need to click on the battery and then disable it from the Dropbox menu.
Step 5: Your screen will now display a drop-down menu. You must select the Enabled option in order to enlarge it. Now By selecting Apply and OK, you may save all of your changes.
Check to see if your issue has been resolved.
Method 7: Disconnect the power cord from your laptop.
If your USB Ports Not Working, you can try removing the battery from your laptop to resolve the issue. As many people have reported, this solution has worked quite well. To do so, simply remove your laptop’s battery and press the power button for roughly 30-40 seconds.
This method will aid in the discharge of your capacitors. Many customers found that leaving the laptop powered off after removing the battery for the night was more effective. It will undoubtedly assist you in resolving the USB Ports Not Working problem.
Conclusion
Skyrim Outlook Not Responding api-ms-win-crt-runtime-l1-1-0.dll is missing api-ms-win-crt-runtime-l1-1-0.dll is missing api-ms-win-crt-runtime-l1-1-0.dll is missing api-ms-win-crt-runtime-l1
We’ve given you some suggestions for how to fix a laptop’s USB ports that aren’t working. We urge that you follow the solution in the post step by step. We are confident that you will be able to resolve the problem, but if you are still unable to do so, contact a specialist.
Macintosh is the full name of a personal computer. It is created and sold under the Apple brand, and it comes with high-quality hardware and software. A large number of users prefer to utilise Mac. In the market, there is always a battle between Windows and Mac computers.
All technologies have small or big drawbacks. The microphone on the Mac has a problem. Your Mac has an inbuilt microphone at the top of the screen that accepts audio as input. There may be some troubles with the microphone from time to time. It may stop working or be incompatible with certain programmes.
how to
We’ll discuss about that problem, why it exists, and how to overcome it in this article, so keep reading.
What causes the Microphone on a Mac to stop Working?
On the basis of feedback from several users and some of our investigations, we have discovered some of the causes of Mac Microphone Not Working. Although the underlying causes may differ, all of the treatments we’ve offered are successful.
Low Input Level: If your microphone’s volume is set too low, it may not pick up your speech effectively, causing the problem. To solve the problem, change the voice from low to high in the settings.
Incomplete drivers: The drivers are primarily responsible for connecting your microphones from hardware to the operating system. It’s possible that your microphone won’t work if the driver for your device isn’t working properly, or if it’s outdated and corrupted. To fix the problem, make sure you have the most recent driver installed.
Corrupt Settings: Your Mac’s settings can sometimes prevent the microphone from working properly. It could be missing or corrupted. To resolve the problem, you can try resetting all of your Mac’s settings.
User Account Glitch: The user account that you use to log into your Mac device may include an error or be glitched at times. It’s not a typical issue, but it can cause problems with your device.
Application Permissions: Using your Mac’s settings, you can control the microphone’s accessibility through the application. It’s possible that the issue arises because these settings haven’t allowed microphone access to some applications.
Program Microphone Level: Using the settings of each application, you may determine the level of input that you want the microphone to process. It will not work well if the input level is too low.
Corrupt programme: If your microphone is not working properly for any application and all permissions are set correctly, the applications you are putting on your device could be the source of the problem. You can try uninstalling and reinstalling apps to resolve the problem.
Third-party peripherals: It’s likely that your device will be connected to other peripherals. They can influence your device’s speakers and microphone, causing them to malfunction in some situations. You can try disconnecting and reconnecting to see if it solves the problem.
Interference from other third-party software: Third-party software can sometimes interfere with the microphone’s operation, causing it to malfunction. You might try to put your device in safe mode and pinpoint the source of the issue.
Microphone obstructed: Some people use stickers or tape to cover up their device’s microphone. They sometimes block the microphone, making it impossible to convey the voice effectively.
Noise reduction: Because your Mac device includes a built-in noise reduction feature, it reduces background noise. This function can malfunction at times, and it may even lessen the volume of the voice you provide as input.
Numerous microphones: Some users have their devices equipped with multiple microphones. It’s conceivable that the mics haven’t been correctly picked and are malfunctioning.
Broken or damaged microphone: If your microphone is broken or damaged, it will not work properly. In this instance, you can get assistance from any Mac technician.
What to Do If Your Mac Microphone Isn’t Working?
We have given you with remedies to the problem of the Microphone Not Working in this article. We recommend that you follow the solutions in the order that we have listed. All of the methods are really effective at resolving the issue. So have a look at the alternatives.
Method 1: Checking Application Permissions
If your microphone’s voice is transmitting properly when you’re using a specific application, it’s conceivable that your Mac device hasn’t allowed that application to run. Via browsing through the settings on your device, you may choose which programmes you want to be accessed by the device’s microphone. That is, we will check over your Mac’s settings to make sure that all of the applications are correctly permitted and that all of their modules are working effectively.
Step 1: Open your device’s System preferences by selecting the Apple logo at the top of the screen.
Step 2: Go to the System Preferences and select the Security and Privacy tab.
Step 3: After you’ve opened the privacy settings, go to the left navigation panel and select the microphone option.
Step 4: All of the applications that can be granted using your microphone will now appear on the right side.
Step 5: At this point, you have the option of ticking or unticking the applications to which you want to grant permission.
Step 6: Determine which applications are causing issues and mark them as such. After you’ve saved, you can now exit.
Step 7: Finally, restart the applications and check your microphone to see if the problem has been resolved.
Note: If you are unable to alter the settings, click on the lock button and then enter your credentials to change the settings.
Method 2: Checking the Application Input Level
Before you test your microphone, you should double-check that all of the settings in your microphone applications are correct. All of the programmes have their own audio and microphone options, allowing you to customise the input and speaker volume. They also have the option of using the Push to Talk or Voice Activity options. You should go through each application’s personal settings and make sure that all of the microphone settings are correct.
After you’ve double-checked that all of the applications’ settings are correct, you may move on to the next solution.
Method 3: Changing the Volume of the Input
The next step is to ensure that the volume of your device’s microphone is set to an acceptable level. The level of input in your device displays the volume of your microphone’s speech. For instance, if the volume of your Microphone is set to low, you will find that your voice is muffled. If it’s too high, on the other hand, you’ll think your voice is too loud and obnoxious. Set the input of your microphone to an appropriate setting that is neither too low nor too high for a decent voice experience. As a result, we’ll go over the settings on your Mac computer to change the input of your microphone so you can get a good volume quality.
To adjust the input volume of your microphone, follow the procedures outlined below.
Step 1: First, open System Preferences, then select Sound from the drop-down menu.
Step 2: Now you can customise the input on the top bar. Select Internal Microphone from the drop-down menu.
Step 3: Use the slider to adjust the volume. It will rise in the right direction and fall in the left. You can Save and then Exit it once you’ve completed it and are satisfied with the voice.
Step 4: Check to see if the problem has been resolved.
Note: If you’re experiencing trouble with the sound from any of the other mics in your device, you can change the level and pick it.
Method 4: Disabling Ambient Noise Reduction
You have the ability to reduce the amount of unwanted noise in the environment by using the option on your Mac laptops. Even when the noise is too low, it can aggravate the original sound. Ambient noise reduction is already turned on by default on your Mac. This auto enable option is adequate, however many customers have reported that it interferes with the usual use of their microphone. Because they occasionally notice that their voice is too quiet or completely crushed. That is why we have supplied you with an option to disable the feature of auto ambient sound reduction by going via the Sound settings. So all you have to do now is follow the steps –
Step 1: Go to the Sound option in System Preferences by following the preceding instructions.
Step 2: Next, go to the top bar and select the input option, then Internal Microphone.
Step 3: Make sure the option Use Ambient noise reduction is selected. All you have to do now is untick that box. You may also pick and disable the noise reduction option for any other microphones you have attached.
Step 4: Finally, save the changes you’ve made and exit. Take a look to see whether the problem has been resolved.
Method 5: Activating Dictation
Your Mac laptops have a capability that allows you to turn the words you’ve provided as input in your microphone to text whenever you wish. This can be a game changer for authors and can also be used in a corporate setting. However, the feature has nothing to do with the problem. According to some accounts, enabling the feature of converting audio to text can cause your Mac to automatically install drivers. Such auto drivers resolve the microphone problem. When you enable the auto dictation option, your drivers are automatically downloaded.
To do so, follow the steps outlined below:
Step 1: First, enter System Preferences by following the preceding instructions, and then select your preferred keyboard type.
Step 2: Now go to your keyboard’s settings. Look at the top of the screen for a dictation option, which you must select. Now you must turn on the functionality and select Use Enhance Dictation from the drop-down menu.
Step 3: Save the modifications you’ve made.
Step 4: Your Mac will not automatically download the drivers that it need. On the lower left side of your screen, you can see how far the download has progressed.
Step 5: At this point, Save the changes you’ve made again, and then click Exit.
Step 6: Restart your Mac computer and check to see if the problem has been resolved.
Method 6: Disconnecting third-party peripherals
If none of the aforementioned methods work for you, we can assume that the problem is caused by any third-party peripherals connected to your Mac device. According to various investigations, these third-party accessories can cause issues with your Mac’s operating system. According to many Mac users, unplugging third-party accessories and then restarting the device will solve the problem.
Peripherals include microphones, headphones, and even the mouse and keyboard that are attached to the device. All peripherals that are attached to your device must be disconnected. Finally, take a look at your microphone’s registration.
Method 7: PRAM or NVRAM reset
Non-Volatile Random-Access Memory (NVRAM) is a type of memory that is not volatile. It’s a type of memory found in Mac computers that’s primary purpose is to save settings so that they can be recalled later as needed. PRAM stands for Parameter Random Access Memory, on the other hand. It’s the same thing as NVRAM. Both types of memories can be reset with a single item. These memories save all of your configurations, and if a problem happens, you may revert the settings to their default state.
Note: It’s possible that some of the configuration will be removed as a result of this. That is why you should consider how you might reclaim them.
Step 1: You must now turn off your smartphone. You must go through the following keys on your keyboard after turning it on.
command + P + R + option (alt)
Step 2: Keep your hands on the keys for roughly a half-minute. Your Mac computer will boot up as a result of this. You have two options when it comes to leaving the keys:
Step 3: After you’ve successfully started up your Mac computer, go through the settings to see if you’ve successfully flushed out the problem.
Method 8: Creating a New User Account
If all previous options have failed to help you, try creating a new user account for yourself.
The majority of the time, user accounts do not have any issues. However, we believe that creating a new user account will assist you in resolving the problem. That is, we will create a new account in this solution and check to see if the problem has been resolved and your microphone is working properly. If the problem persists, you can also move all of your data to this newly created account.
To establish a new account, follow the steps outlined below:
Step 1: As with prior methods, go to the System Preferences option. Then select Users & Groups from the drop-down menu.
Step 2: Go to the bottom-left of your screen after you’ve opened the Users & Groups option. There has to be a Plus button somewhere. You must select it by clicking on it.
Step 3: A new window will appear as a result of this action. Then, using the Create User option, fill in the required information and create a new user account.
Step 4: Finally, complete the most crucial step by logging off your Mac. After that, restart your device. Then log in using a different device.
Check to see whether the problem has been resolved.
Method 9: Resetting the SMC
SMC is responsible for a number of functions in your Mac computer, including battery and thermal management, as well as keyboard lighting. If you are experiencing any troubles with your Apple device, such as a microphone problem, you should reset the SMC. According to Apple’s official website, this is the case.
Some conditions must be met in order to reset your SMC, such as whether or not your device has a battery, but it must have a T2 security chip of the latest version. As a result, we’ll demonstrate how to reset the SMC on a popular MAC.
Note: You can also do so by following the directions on your Apple’s official website.
SMC Reset on a Mac Notebook (non-removable battery)
This solution is designed specifically for users of newer devices with non-removable batteries. Follow the instructions below –
Step 1: To shut down your Mac, first go to the Apple menu on your screen and select Shut down from the drop-down menu.
Step 2: Locate the Shift and Control buttons on the keyboard and push them simultaneously with the power button. For a few seconds, you must maintain pressing these keys. For around 10 seconds, we can say.
Step 3: When the 10 seconds are over, release these keys and press the power key again to turn on your device.
Note: If you have a touch ID, it may also be used as a power button.
SMC Reset on Mac Notebooks (removable battery)
This method is for people who have a Mac that has a replaceable battery and is a slightly older model. All you have to do in this case is power cycle your smartphone.
To do so, follow the steps outlined below:
Step 1: First, turn off your device and then remove the battery.
Step 2: After turning off your device, press and hold the power button for a few seconds. For around 10 seconds, we can say.
Step 3: Finally, insert the battery and turn on your device.
Finally, double-check that you’ve completed it successfully.
Method 10: Checking for Physical Damage/Obstruction
If none of the preceding alternatives worked for you, your microphone may have suffered physical damage, which is why it isn’t operating properly. They are most commonly damaged when you try to clean them with a pin or another tool. It’s possible that your microphone is obstructed. They may become obstructed by tapes or stickers, preventing the voice from being transmitted effectively.
In this case, we strongly advise you to visit any Apple repair centre and get it checked by an expert. However, you might try going to the Apple help website and getting some advice from the support group first.
Conclusion
We’ve outlined all of the options for resolving the Mac Microphone Not Working problem. We’ve also tried to supply you with as much information as possible. We propose that you follow the techniques in the text step by step. We’re confident you’ve found a solution to your problem. However, if the problem persists, you should seek assistance from a service centre.
Google Chrome, a cross-platform web browser for Microsoft Windows, was developed and released in 2008. Since its release, it has become the most used active web browser platform. Though it was initially only available for Microsoft Windows, it has now been ported to Linux, macOS, iOS, and Android, and is now the default browser. Chrome is a popular and effective online browser, yet it has several faults.
When trying to open Chrome on a Windows 10 device, several users have seen an issue. They see a message that says, “Chrome Won’t Open in Windows 10.” If this is the situation with your gadget, there is no need to be concerned. This essay will concentrate on a few simple and efficient solutions to the Chrome problem. This could be the result of corrupt files or viruses on your system. So, let’s get started with our answers, and we’ll expect you to follow them in the correct order.
window
How can I Open Chrome in Windows 10 if it Won’t Open?
We are about to explore the solutions that will assist you in resolving the problem. Chrome Isn’t Working on Windows 10 So let’s keep going to find out what they are.
Before we get to the solutions, here are several workarounds that may help you save time.
Step 1: Restart your device and check to see if the problem has been repaired and Chrome is working properly.
Step 2: Disable any active anti-virus or firewall software on your device and see if that helps.
If Chrome still doesn’t reply after this, it’s time to turn to the remedies.
Method 1: Rename Chrome and create a desktop shortcut.
Step 1: Press the Windows key and the E key on your keyboard at the same time to launch File Explorer on your device.
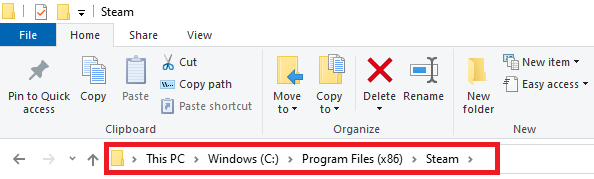
Step 2: Go to C:Program Files (x86) in the File Explorer Window.
Google\Chrome\Application
Step 3: Now that you’ve found the application folder, right-click on the chrome icon and choose the rename option from the pop-up menu.
Step 4: Change Chrome’s name to Chromel.
Step 5: Right-click Chromel and select the > arrow next to Send to from the options that appears.
Step 6: Select Desktop from the drop-down menu that appears (create shortcut). Chromel will be created as a shortcut on your desktop as a result of this.
Step 7: Close the window of the file explorer.
Step 8: Right-click the Chromel icon on the desktop and select rename.
Step 9: Rename it again to Chrome.
Step 10: Double-click the Chrome shortcut icon on your desktop to complete the process.
Alternative
Chrome should now work properly on your device, and if Google Chrome is already pinned to your device’s taskbar, go to the steps below.
Step 1: To unpin the Google Chrome icon from the taskbar, right-click on it in the taskbar and select unpin from taskbar.
Step 2: Double-click the Chrome shortcut you generated earlier.
Step 3: Right-click on the Chrome icon in the taskbar and select Pin to Taskbar.
Try running the Chrome browser immediately, and if the problem persists, move on to the next step.
Method 2: From your device’s taskbar, restart the Chrome process.
Step 1: To open the Task Manager Window on your device, concurrently press the Ctrl, Shift, and Enter keys on your keyboard.
Step 2: Go to the Processes tab and look for Google Chrome in the list of programmes.
Step 3: Right-click Google Chrome and select End Task once you’ve found it.
The Google Chrome process on your device will be terminated by following these procedures. Check if it worked by reopening your Chrome browser.
Method 3: Delete the user profile from your device’s Google Chrome folder.
Step 1: To open the Run Window, press the Windows key and the R key on your keyboard at the same time. Now type percent USERPROFILE percent AppDataLocalGoogleChromeUser Data into the search box.
Step 2: Click OK in the Run dialogue box.
Step 3: Find the Default folder, right-click it, and choose copy to copy the entire folder.
Step 4: Copy the folder to any location on your hard disc. This will make a duplicate of the original folder.
Step 5: Return to the user data folder and pick the Default folder, which you should delete from your device.
Step 6: Restart and open your Chrome browser.
Step 7: In the address box, type chrome:/settings/resetProfileSettings and press Enter to reset Chrome.
Step 8: The screen will now display a popup instruction. Reset the settings by using the Reset Settings button. Chrome will now be reset.
Check to see whether the problem has been resolved.
Method 4: Use the Chrome browser’s built-in malware and virus scanner.
Step 1: On your device, open Chrome and put chrome:/settings/cleanup into the address bar.
Step 2: To find malicious software, click the Find button next to it in the settings box.
The application will now search for the malicious software that is causing the issue on your device. Restart the Chrome browser and see whether the problem still exists.
Method 5: Disable DNS caching
Step 1: To open the Run Window, press the Windows key and the R key on your keyboard at the same time.
Step 2: To open the command prompt window, type cmd and concurrently press the Ctrl, Shift, and Enter keys on your computer.
Step 3: Type the following commands one by one in the command prompt, pressing Enter after each one.
C:RESETLOG.TXT NETSH INT IP RESET
reset winsock netsh
/flushdns ipconfig
Step 4: Restart your computer and open Google Chrome to see if the problem has been resolved.
Method 6: Reset your computer’s network settings.
Step 1: To open the settings window, press the Windows key and the I key on the keyboard at the same time.
Step 2: Select Network and Internet from the drop-down menus.
Step 3: Scroll down to the bottom of the Status panel and select Network Reset.
Step 4: Reboot your computer.
Conclusion
These remedies will undoubtedly address the problem of ‘Chrome not opening in Windows 10’.
When an error occurs in the middle of a task, it is understandably frustrating for everyone. One error that causes problems is Error Loading Player No Playable Sources Found. Many users are experiencing the same issue, and there is no need to be concerned if you are one of them. By following the steps outlined below, you will be able to resolve the problem. There are a variety of causes for this error, and we will attempt to resolve it using every available method. So, before we get started, let’s make sure we understand why this issue occurred in the first place.
What Causes Error Loading Player No Playable Sources Found
No Playable Sources Found Error Loading Player Even if you have a fast internet connection, you may get an error while streaming films and audios on your browser. This error can be caused by a number of factors, the most prevalent of which are:
The cache of your browser
This problem could be caused by your browser’s cache. If your browser is overburdened with data, it will prevent you from playing video or music, resulting in the error. Clearing your browsing data can assist you in addressing the problem in this scenario.
Browser versions that are no longer supported
If you are using an outdated version of the browser, the problem will be visible since new functions of your application will not operate. In this scenario, you must update your browser to the most recent version.
An older version of Flash Drive is available.
The most typical cause of this problem is using an outdated version of the flash drive. As a result, the user will be unable to stream online videos in this instance, and upgrading to a newer version may be necessary to resolve the problem.
How to Resolve Error Error while loading player: No Playable Sources Found
Error Correction No Playable Sources are Loading Finding an error is a simple procedure; all you have to do is follow the methods below and implement the one that best matches your needs.
Method 1: Allow Flash to run
This is the most effective technique for resolving this issue. When you visit a website that utilises Flash, the right side of Chrome’s address bar displays a “Plugin blocked” notice. In this situation, all you have to do is change the settings to allow the flash to run. To continue, follow these instructions:
Step 1: Open Chrome and select Site Settings from the lock symbol on the left side of the address bar.
Step 2: Find Flash in the Permissions section and select Ask (default). A drop-down menu will appear; select Allow from the menu.
Your browser may now access Flash-based online resources.
This is the most effective way, so perhaps it will cure the problem. If you’re still having trouble, move on to the next step.
Method 2: Reinstall Adobe Flash Player
The issue can be resolved by uninstalling and then reinstalling Adobe Flash Player. To do so, follow the instructions below:
Uninstalling
Step 1: Go to the Start menu and type Control Panel into the search box. Select Uninstall a Program from the Programs area after opening it.
Step 2: Select Uninstall from the menu bar when you right-click on Adobe Flash Player.
This will remove Adobe Flash Player from your computer, and you will need to reinstall it.
Re-installing
Step 1: Type Adobe Flash Player into your browser. Go to the Adobe website and download the most recent version of Flash Player for your Windows version.
Step 2: Download the software and execute the installer by double-clicking the downloaded file. Now, continue the installation procedure by following all of the on-screen prompts.
Restart your computer and see if the problem has been repaired.
Method 3: Delete Internet Explorer’s History
Clearing the browser’s history can also help, as overloading can prevent you from streaming films and audios. Following the instructions below will allow you to clear your browser’s history:
Step 1: In Chrome, go to your profile image and click the three dots next to it. To open it, select History and then History from the submenu, or just press Ctrl + H.
Step 2: From the left panel, select Remove browsing data, and you’ll be given the option to clear your browsing data for a range of dates and hours. Select the option all time to remove all of your history. When you click Delete, the item will be removed from your Chrome history.
If clearing the history does not solve the problem, you should attempt the next method.
Method 4: Install the latest version of Google Chrome.
Updating the Google Chrome Browser from an earlier version to a newer one may aid in the resolution of the problem. If you’re still using an older version, you should upgrade it by following the procedures below:
Step 1: Find the Customise menu icon, which looks like three vertical black dots, in the top-right corner of Chrome and click it.
Step 2: Select Help and then About Google Chrome from the drop-down menu.
As soon as the About Chrome box opens, it will begin automatically checking for any available updates for Chrome. If updates are available, it will begin to download them automatically; you will not be prompted to do so.
Step 3: Once the download process is complete, install the updates. After that, click the Relaunch option to finish the process. Chrome will be restarted if you click it.
Step 4: After relaunching Chrome, you’ll be using the most recent version, and it’ll tell you that it’s up to date.
This will update your Google Chrome browser, and the issue should go away as a result.
Method 5: Add Flash Exceptions
Using flash exceptions can assist in resolving the issue. You simply need to follow the steps below to get started:
Step 1: Open the browser and select the customise menu icon from the drop-down menu. From the menu, choose Settings. Scroll down to the bottom of the Chrome Settings screen and select the Show advanced settings option.
Step 2: Click the Content Settings option under the Privacy section and scroll down to find the Flash option. You can also go to the page by typing chrome:/settings/content in the address bar.
Step 3: Under Flash, click the “Manage Exceptions” button to manage the list of websites to which you’ve granted permission to run Flash. After that, you’ll see a list of websites where you may decide which ones are authorised to run Flash.
Hopefully, this strategy has assisted you in resolving your problem. However, if the problem persists, there is no need to be concerned because there are numerous other solutions available. So, let’s go on to the next technique.
Method 6: Install the most recent version of Windows.
If none of the previous approaches were successful in resolving the problem, it is quite likely that the issue is caused by an earlier version of Windows. In this case, you must update Windows to the most recent version. Follow the steps below to accomplish this:
Step 1: Press the Windows key + I hotkey to open the Settings menu. Select Update and Security from the drop-down menu.
Step 2: Select the option to Check for Updates.
This will check your PC for any available updates. Updates will be displayed if they are discovered. Updates will be downloaded and installed automatically.
Restart your computer after you’ve completed the process to see if the problem has been resolved or if it still exists.
Method 7: Use Networking to Enter Safe Mode
Safe mode is the best option to fix problems that are interfering with your computer’s normal operation. It is regarded as one of the most effective strategies for dealing with faults of this nature. Many users have found it to be beneficial in resolving this issue and resuming normal operations. So, try to fix the problem by booting into Safe Mode with Networking, and here’s how to do it:
Step 1: Press the Windows key + R to open the Run window. Enter the command msconfig.
Step 2: Go to the Boot tab and select the Safe Boot option from the Boot Options section. The choices below it will be active as a result. Select Network from the drop-down menu and hit Ok to save your changes.
Now restart your computer and see whether the error appears. If the problem remains, move on to the next step.
Method 8: Check for Viruses
If your website is infected with a virus, this type of problem is likely to occur, halting the website’s operation and preventing you from streaming films and audios with the Error Loading Player There was a problem with No Playable Source. If this is the case, we propose that you use antivirus software and a firewall to eliminate the virus from the website in question, thereby resolving the problem. If you don’t want to use the antivirus or firewalls, you can turn them off temporarily or delete them after the malware has been removed.
Method 9: Turn off ActiveX Filtering (Only for Internet Explorer Users)
If you’re using Internet Explorer, try turning off ActiveX Filtering, as many Internet Explorer users have reported that doing so solves the problem. To disable ActiveX filtering, follow these steps:
Step 1: Open Internet Explorer and go to the upper-right corner of the window to the gear icon. From the drop-down option, choose Safety.
Step 2: Locate the option ActiveX Filtering in the sub-menu that displays. ActiveX Filtering is enabled if it has a checkmark next to it. Uncheck the option by clicking on the checkbox. The ActiveX filtering will be disabled as a result of this action.
You can disable ActiveX filtering in this way, which will assist you in resolving the error.
Method 10: Switch to a different internet browser
It’s conceivable that the issue is isolated to the browser you’re using. The issue is clear to occur if your browser does not support or allow access to the Flash Player. If this is the case, consider using a different web browser to resolve the problem. Additionally, use trusted browsers like Google Chrome (preferred), Mozilla Firefox, Internet Explorer, and Opera. If you notice that movies and audios work properly in a different browser, it’s evident that the one you were using previously either didn’t support Flash Player or had issues.
Method 11: Launching in Incognito Mode
If you’ve tried everything and still can’t solve the problem, you’re left with only one option: open your website in Incognito Mode. Although it may appear ludicrous, utilising Incognito mode is the simplest and most effective way to resolve this problem.
Some third-party extensions may be preventing the Flash Player from working properly, preventing you from streaming videos and audios on your browser. When you visit a website in Incognito Mode, all third-party extensions are disabled. If everything is working well, the issue is most likely with the extensions, and deactivating them one by one can help you resolve the problem. Restart your computer after deleting all of the extensions to save the changes.
Here’s how to get started using Incognito Mode:
Step 1: Launch Chrome on your computer. Click the customise menu with the vertical black dots in the top right corner.
Step 2: Select the New Incognito Window option from the drop-down menu. There will be a new window that appears.
Users of Windows, Linux, or Chrome can alternatively use the keyboard shortcut Ctrl + Shift + N to open an Incognito window.
Conclusion
Finally, we addressed all of the options as well as applicable strategies for resolving the problem. Hopefully, like all other users who have benefited from these methods, you will be able to get rid of the issue. Furthermore, if you are still unable to resolve the problem, we recommend that you get assistance from an expert specialist.
When the drivers required in the iPhone for always attaching the device to the appropriate Windows are missing, the issue known as “Apple Mobile Device USB Driver Missing” occurs. These drivers are recognised to serve as the primary interface between the hardware and software. As a result, the system is able to run smoothly.
If it is not present in the system, the operating system will lag behind in the device interaction phase. Every device on the market must have its own set of drivers. You should only proceed with the data after installing the drivers. To fix this problem, start by installing the Apple device drivers. Manual mode should be used for this. Check to see if this step is beneficial to you.
how to
Causes of Apple Mobile Device USB Drive
Apple’s mobile phone We are unable to locate the USB driver: The problem of invisibility only occurs when your system is unable to display the drivers that are all affiliated with Apple and also attached to the machine.
Apple’s mobile phone Device management is missing a USB driver: The issue appears as a warning to consumers that their Apple device was not detected by the device manager while they were attempting to connect to the computer. In general, it indicates a problem with the connection between your computer and your Apple device.
The Apple Mobile Device Service is not available: All Apple-related applications and software have their own built-in Windows service provider. These are used to make the software work. If there is a difficulty with the USB driver, the features will not be able to start at all.
How to Troubleshoot an Apple Mobile Device
Solution 1: For the USB Driver Missing Error is to double-check the connection of your Apple device.
Find out if the Apple device and your system are connected before we start working on the device management and manually installing the driver. If the driver or device isn’t visible, it’s because the attachment hasn’t been set up. Examine the data cables to see if they are transmitting data correctly and if they are functioning properly. According to a few complaints, the cables perform admirably during the charging process but fail miserably when it comes to transmitting data.
As a result, you will not have the ability to back up your iPhone. When the cable is working properly, you must adjust the port. It should be carried out in the location where your respective is connected to your system. You can also unplug the cable and then reconnect it with the system. Examine whether or not the device is visible.
Solution 2: Reinstalling the Apple Mobile Device USB Driver
When the system is already connected but the Apple device is still not recognised by the system, the reinstallation method always works. We’ve discussed the solutions to two procedures so far. Yes, both the Apple iTunes and Microsoft Store downloads are available. It is entirely up to you to decide. Follow the guidelines that have been provided.
If you want to continue the iTunes download through the Microsoft Store, follow these instructions:
Step 1: Disconnect all of the Apple device’s connections from the system. This can be accomplished by disconnecting the cable.
Step 2: You must unlock your Apple device’s lock. The home screen appears there. Re-establish your Apple device’s connection with the device’s screen wide open. If the iTunes window appears, we recommend that you close it immediately. Throughout the procedure, make sure the device you’re using is in the open state it needs to be.
Step 3: Press Windows + R to bring up the Run dialogue box. Then, in the text area, put “devmgmt.msc.” Now press the Enter key.
Step 4: The Device Manager appears on the screen. As a result, expand the Portables devices. After that, right-click on the Apple device option you’re using. Now press the Update driver button.
Step 5: Select “Search automatically for updated driver software” as the top option. It’s up to you to make the decision.
Step 6: Now that you’ve installed the improved version of the driver, go through the following steps: Windows Update may be found under Settings à Update and security à Windows Update. Keep your Windows up to date at all times. At the very least, attempt to meet this condition.
Step 7: Launch the iTunes programme that you just installed. Check to see if the problem is still present.
If you’re using Apple to download, follow these steps:
Step 1: Disconnect all of the Apple device’s connections from the system. Those cables can be unplugged.
Step 2: Switch on your Apple device. Establish a connection between your system and the Apple device on your home page screen. If the iTunes window appears, we recommend closing it for the time being. Throughout the procedure, make sure the device you’re using is in the open state it needs to be.
Step 3: Press Windows + R to bring up the Run dialogue box. Then put “% ProgramFiles% Common Files Apple Mobile Device Support Drivers” in the search box. Now press the Enter key.
Step 4: When the file explorer is available on the screen, the number of files will appear. Simply right-click on inf and usbaapl64.inf. Install should be selected.
Step 5: It’s critical that all of your files have the extension “.inf.” Follow the procedures outlined above to complete the installation.
Step 6: After you’ve finished installing your device, disconnect it. Then re-connect it. Start with iTunes to see if the problem has been rectified.
Solution 3: Restarting the Apple Mobile Device Service
Windows provides a service that runs Apple drivers throughout the system. This service also supervises the module and ensures that every function in your Apple device is carried out correctly by resolving any issues. This service provides the necessary interface for your Apple mobile devices. If the service is to blame for the problem, you’ll need to restart your system. Check to see if the problem remains. Follow these instructions as a guide for this procedure:
Step 1: Press Windows + R to bring up the Run dialogue box. Then, in the given text file, type “services.msc.” Press the Enter key.
Step 2: You’ve made it to the services. Look for the “Apple mobile device Service” service. Give it a right-click and then select Properties.
Step 3: To stop the service, first select Stop, then Start. Set the startup type to Automatic at all times.
Step 4: Attempt to connect the Apple gadget to your computer once more. Then launch iTunes. Check to see if the issue is still present.
Conclusion
All of the solutions are of high quality. If the problem persists, just erase the iTunes software from the device, as well as the device itself, while keeping Solution 1 in mind. Then reinstall them both. One more time, set up the attachment. As a result of the action you just took, the device’s default drivers will be installed. If the method fails to eliminate the issue, try connecting the Apple device to a different machine. You can also select a port modification option for your system.
The printer serves as both a hardware and a software device. It allows you to connect to your PC via wire or wirelessly, however you may have run into the message that the printer driver is unavailable on Windows 10. When you connect the printer to the computer, you will receive a signal that the printer has been successfully connected to the computer and is ready to use. If the notification does not show after successfully connecting the PC and printer, there may be a problem that is causing the notification to not display.
Here are some of the reasons why your notification isn’t showing up:
windows
Printer driver: This is the most common cause of this problem; viruses and malware can cause the printer driver to get corrupted.
Missing printer drivers can also be a problem; in certain cases, you may have a printer driver but have failed to install it on your computer.
The Printer driver was also inaccessible due to the corrupted window.
Some simple errors, such as not correctly connecting the printer and computer, can cause the printer driver to become unavailable.
Here, I’ll show you all of the available and effective solutions for resolving the printer driver’s unavailability. Here is a list of the methods that we will be working on.
Method 1: Unplug the Printer and restart it.
One of the foolish mistakes that can cause the printer driver to become unavailable is if the cable connecting the printer and computer is not correctly connected. You can resolve the printer driver issue by reconnecting the cable after 30 seconds of unplugging it, as well as restarting the printer.
Method 2: Double-check all connections
It’s possible that the connection connecting the printer and PC isn’t correctly connected. It’s possible that the cable was connected to the wrong USB port, therefore be sure to change the USB port. You should choose this strategy because it is simple and straightforward. I’m hoping you’ll be able to resolve the printer driver issue. If not, don’t panic; there are lots of other options.
Method 3: Look for Wireless Alternatives
If your printer has a wireless connection option, be sure to check the printer’s WIFI and turn it on if it is off. For more information, consult the instructions and read the handbook that came with the printer. It allows you to link the printer to other devices such as computers, smartphones, and tablets. If you are unable to connect to the printer’s Wi-Fi, you can do so. Check out the manufacturer’s website and follow the instructions for turning on the Wi-Fi option in your printer.
Method 4: Disconnect the printer from the computer.
Another simple way is to uninstall the printer driver to resolve the issue. You may have noticed that the printer driver is not available on the window; in this case, simply remove the printer driver by following these steps:
Step 1: Press the window button until the options menu displays, then select the control panel.
Step 2: In the control panel, look for devices and printers and click on them.
Step 3: Select Remote Devices from the Printer menu.
Step 4: Finally, uninstall the printer driver.
You can delete the Printer Driver and fix the issue by following these simple steps.
Method 5: Reinstall the Printer Driver
Reinstallation is always a preferable option for fixing this mistake, and you should soon be able to hear a pop on your PC when you connect the printer to it. There’s a chance the printer device you installed didn’t work because of a variety of factors, including missing data, interrupting the installation process, corrupted files, and viruses. I’ll walk you through some of the procedures to resolve the issue by just reinstalling the printer driver.
The first step is to uninstall the printer driver.
Step 1: Press the window button until the options menu displays, then select the control panel.
Step 2: In the control panel, look for devices and printers and click on them.
Step 3: Select Remote Devices from the Printer menu.
Step 4: Finally, uninstall the printer driver.
The printer driver is reinstalled in the second phrase:
Step 1: Press the window button until the options menu displays, then select the control panel.
Step 2: In the control panel, look for devices and printers and click on them.
Step 3: Finally, select Add Printer.
Step 4: Double-check that the printer and computer are both turned on.
Step 5: To successfully install the printer driver, follow the instructions when installing. Do not interrupt the installation process.
I hope this strategy works for you and that you are able to resolve the printer driver issue.
Method 6: Install the most recent printer driver
Here are some of the most recent printer brands available on the market, and you should install the printer driver on your PC before using it, as you will not be aware of the printer even after connecting the printer and PC.
HP stands for Hewlett-Packard, and it is a well-known brand that originated in the United States. It offers a variety of cost-effective and high-quality products, and you also received a legitimate printer driver CD from the firm.
1. Driver for Canon printers
When you hear Canon, the first thing that comes to mind is a camera, so they not only make amazing and affordable cameras, but they also make cameras. They provide cash printers a lot of incentives. It also has a variety of scanning options.
2. Driver for Epson printer
Epson not only makes printers, but also projectors, and their products stand out in the market. Whether it’s a printer or a projector, most users say the Epson printer has more issues with Windows than any other printer.
3. Printer from Brother
In India, Brother Printer is one of the most popular printers. They not only give excellent quality, but their goods also includes a high-grade compatible cartridge for the printer. Believe me when I say that if you get a printer from this brand, you will never be sorry because it has excellent build quality and the print quality has never been compromised. The majority of consumers gave this brand positive evaluations, and most of them never had any problems connecting the printer and PC.
4. Driver for Samsung Printer
Samsung is a technology company most known for their mobile phones, but they also manufacture a variety of other items such as printers, mobile phones, iPads, laptops, desktop computers, headphones, and more. Installing the printer driver on your PC will allow you to effectively connect your printer to your computer.
Method 7: Fill the window with all of the available options.
Regular updates keep your windows healthy, regardless of the version. This means you may avoid missing files and viruses by simply updating your windows, and little errors, such as printer driver issues, can sometimes be resolved. Here are some instructions for all types of recent windows.
1. Microsoft Windows 10
It is the most recent window that is currently available on the market. Here are some suggestions for updating it.
Step 1: Press the window button and type “Check for update” in the search box.
Step 2: The opportunity to update displays on your screen.
Step 3: Begin upgrading the window by following the instructions and restarting your computer immediately afterward.
2.Window 8
Here are some instructions for updating Windows 8.
Step 1: Press the window button and put “Check for Update” in the search box.
Step 2: The opportunity to update displays on your screen.
Step 3: To update the window, start by following the instructions and don’t interrupt the process; you can also print the file if you want to double-check your work.
I hope you are able to update Windows and that you are able to resolve your issue.
Method 8: Make use of a troubleshooter
Troubleshooter is one of the methods for resolving errors, and it can also be used to resolve printer driver issues. To proceed, you must first connect your computer and printer. Then, on your web browser, open “aka.ms/diag printer10” and download the dialogue box. Run the troubleshooter and follow the instructions displayed on your screen. Do not stop the operation.
Method 9: The Print Spooler
The printer spooler is in charge of all procedures that occur during the printing of the file. It is also in charge of connecting the printer to the computer. Clearing the spooler files and then restarting is one option. I’ll show you how to fix the printer driver in the following stages.
Step 1: Press “window”+ “r” at the same time to bring up a conversation box in the bottom left corner of the screen.
Step 2: In the run box, type “msc” and hit enter.
Step 3: Locate print spooler in the menu that displays on your screen.
Step 4: Finally, turn off the service.
Step 5: Type – percent WINDIR percent system32spoolprinters into the search box, and then remove all the files.
I hope you followed all of the instructions carefully.
Method 10: Change the printer’s status
If your printer has the advanced function of being able to connect to the internet via Wi-Fi. Then check to see if your printer is turned on or off. If it’s turned off, make sure it’s turned back on. Make sure the printer and laptop are on the same network before attempting to modify the printer’s status using the methods below:
Step 1: Click the window button.
Step 2: Type “printer and scanners” into the search box.
Step 3: Click on the open queue after selecting the printer whose status you want to modify.
Step 4: Select the printer offline option from the printer menu.
Step 5: Double-check the steps below to ensure that the printer’s status is set to online.
We recommend that you unplug all of your gadgets and reinstall them.
Conclusion
As seen above, all of the potential and working solutions are listed, and I hope that one of them is able to fix the Printer driver. As a result, you’ll be notified when the printer and PC are linked.
In this century, the next generation wants nothing more than freedom. One of the best things about travelling is having the flexibility to explore and move at your own speed. In this aspect, Bethesda Game Studios created the best fantasy action role-playing game in recent memory. Apart from defeating the Alduin, the game focuses on the ability to explore an endless number of quests in the built universe (a dragon which is prophesied to destroy the world). Despite the fact that this is a well-performing game, there are a few issues to be aware of. Some Skyrim Failed to Initialize Renderer difficulties can be resolved as a result of this, as noted below.
error
Method 1: Update Graphic Drivers to Fix Skyrim Failed to Initialize Renderer Error
A Graphic Driver is a set of library files that enable a programme to use the graphics device installed on the system. The major goal of updating the graphics driver is to obtain better software in order to get the most out of each graphics card. Obtaining updated drivers will also improve graphic card and game performance.
Skyrim fails to initialise renderer problem might be caused by outdated or crashed device drivers on the PC. As a result, below are the methods to automatically update Graphics Drivers: –
Step 1: To begin, start the computer in safe mode and type ‘devmgmt.msc’ into the dialogue box, then press Enter. Now go to ‘Display adapters’, right-click on the adapter, and choose ‘Uninstall Device’ to remove the driver.
Step 2: In this step, start the computer in normal mode by pressing the Windows key + R. Type’msc’ into the dialogue box that displays and press the enter key. The default drivers will now be installed.
To update graphic drivers automatically, follow the procedures below. If it doesn’t work, go to the manufacturer’s website and manually download it. After you’ve finished installing the drivers, restart your computer. After that, reinstall your much-anticipated Skyrim.
Method 2: Restarting the computer
In a nutshell, Power Cycling is simply restarting your computer. For example, if you have any troubleshooting or technical concerns, rebooting your computer is critical. The error Skyrim Failed to Initialize Renderer is also fixed. Let’s look at how to Power Cycle the system now.
Step 1: Delete all data and shut down the computer completely.
Step 2: Next, remove the battery, hit the power button, and then replace it after a few minutes.
Step 3: Restart the computer and reinstall Skyrim.
In the event of a computer, turn it off fully and disconnect the main power cord. After a few minutes, reconnect the main wire and see if the Skyrim Failed to Initialize Renderer problem has gone away.
As a result, rebooting the computer will start the system from the beginning, reinstalling all applications and making it work as it did before. If there are any problems with one’s electronic gadgets, such as mobile phones or modems, restarting them can assist remove some mistakes.
Method 3: Install the most recent patches and update your mods.
A game’s mod or modification is a feature that alters one or more features of the game. Obtaining new weaponry, characters, or vehicles is one example. These mods alter the game’s etiquette. There may be an error when initiating a game due to changes in etiquette. As a result, it’s best to disable or uninstall the mods and restart the game.
If the error persists, go to the game’s official website, get the most recent patches, then relaunch the game. It is done because the developers are continually looking for ways to improve their application’s performance by giving the greatest possible user experience. As a result, applying the most recent patches or updates results in a slew of enhancements and new features.
Method 4: Run the programme in windowed mode
When we discuss the solution of launching in windowed mode, we must consider Resolution. The resolution could be the reason for the delay in the release of Skyrim. To fix this problem, start the programme in Windowed mode and follow the procedures below:-
Step 1: Launch the Skyrim Launcher.
Step 2: From the main screen, select Options and then Windowed Mode, which is normally located in the lower left corner.
Step 3: Select Windowed Mode from the drop-down menu.
Step 4: Put the adjustments into action.
Step 5: Restart the game to see whether the Skyrim Failed To Initialize Renderer problem has gone away.
If the Skyrim Failed To Initialize Renderer problem persists, try launching the game in windowed mode. If that doesn’t work, try the next remedy.
Method 5: Delete the Game Files
Delete the game preferences and then relaunch the game is certainly another alternative to try. To learn how to delete game files, follow the instructions below:-
Step 1: Turn off all games and applications before starting.
Step 2: Delete the appcache folder from the Stream folder. During the launch of Steam, the file is automatically created.
Step 3: Next, navigate to the Skyrim folder. The default route is as follows:
Step 4: Locate and delete the Skyrim.ini and SkyrimPrefs.ini files.
Step 5: Now turn off the computer and wait a few minutes before turning it back on.
The game should launch without issues if you follow the procedures above. If the following procedure fails, you’ll need to learn how to uninstall and update device drivers.
Conclusion
As a result, Skyrim is largely recognised as the best open-world fantasy game ever made. This game is played by people from all over the world. Skyrim has soared to the top of the most successful games of all time, selling more than 7 million copies in its first week. The number of gamers varies everyday, ranging from over 30,000 to over 70,000. If you’re still having problems with Skyrim Failed to Initialize Renderer, try the methods above.
The Windows Update Error 0x800705b4 is a typical problem that happens when people try to upgrade or update their Windows versions to newer versions. In 2016, Microsoft released an update to its Windows 10 operating system. This version was dubbed the “Windows Anniversary Update” and was expected to reach around 350 million devices around the world at the time.
It was first assumed to be a great launch, but it turned out to be a bit of a flop when consumers starting experiencing a slew of download-related issues. It included the 0x800705b4 Windows Update Error. The error was aggravating since it caused the download to stall or become stuck halfway through, lasted for extended periods of time, prevented any further updates from taking place, and caused a slew of other issues when users tried to use it while it was being downloaded.
error
Other outdated/corrupted components that are the major cause of the 0x800705b4 problem are related to the Windows Defender System’s functionality when it does not allow or is unable to start. Defender Systems that were out of current were unable to process the update and so prevented it from being implemented. Configurations and third-party software were also an issue when the update was being installed.
How to Fix Error 0x800705b4 in Windows Update
The following are several solutions to the Windows Update Error 0x800705b4 error:
Method 1: Run the Troubleshooter
Step 1 – Try searching for Troubleshoot in the search bar to find the Troubleshooting option.
Step 2 – Next, on the pop-up menu, choose Troubleshoot.
Step 3 – Then, on the left side, pick the View All option.
Step 4 – Next, select the Advanced option under Windows Update from the list.
Step 5 – After that, click the Run as administrator option and then Next.
Finally, the Troubleshooter should have found and fixed all issues, including the 0x800705b4 error, allowing the Update to proceed without interruption.
Method 2: Start Windows Defender Error in Windows 10
Step 1 – To begin, go to the Services option by pressing the Windows + R keys together or typing Services in Cortana and right-clicking and choosing Run as administrator.
Type services.msc in the box that opens on your system’s screen, then click Enter.
Step 2 – Next, in the pop-up window, look for the Windows Defender option in the services list.
Step 3 – Next, double-check that the Status column is set to Started/Running. If this column is empty, right-click it and choose Start.
Step 4 – If an error message appears stating that Windows Defender must be force-started, return to the services box and change the Start-up Type to Automatic. This option may be found in the Properties section by right-clicking the windows defender threat protection service properties option in the column and selecting Properties.
Finally, restart your computer and run an update check.
Method 3: Making Use Of The “Background Intelligent Transfer Service” Property
Step 1 – Open the Services menu by pressing the Windows + R keys together or typing Services into Cortana and right-clicking and selecting Run as administrator. Type services.msc into the box that appears, then press Enter.
Step 2 – Select Background Intelligent Transfer Service from the drop-down menu. Stop it by right-clicking on it.
Step 3 – Find the Windows Update option next.
Step 4 – Now right-click on it and select Stop from the menu.
Step 5 – After that, go to the PC tab and look for Software Distribution. Delete all of the files in this folder (but not all of the information). The main purpose of this step is to eliminate the Download and “Delivery Optimization” folders.)
Restart your computer to complete this approach.
Method 4: Changing the Windows Update Panel’s Settings
Step 1: To begin, go to the Windows Update Panel by typing Check for updates into the search box or by heading to the Settings Menu and selecting the Update and Security option at the bottom of the box.
Step 2 – Select Advanced options from the Windows Update screen.”
Step 3 – After that, uncheck the box next to Give me updates for other Microsoft programmes when I update Windows and restart your computer.
Step 4 – Return to the Windows Update Setting noted in Step 1 and click Check for updates.
Step 5 – Now repeat steps 1-4 until you get the message.
The software on your device is up to date.
Step 6 – Select the choice again.
When I update Windows, give me updates for other Microsoft products.
Return to the main page and select the Check for updates option again to complete this procedure, and the Update should download successfully.
Note: It is occasionally necessary to temporarily disable Windows Defender for this option to work.
Method 5: Disable Third-Party Software
Step 1- Identify and disable any third-party antivirus software or firewalls that may be installed and enabled on the computer.
Step 2 – Next, temporarily disable any software and firewalls that may be installed on your computer.
Step 3 – Finally, turn on the Windows firewall and observe if the issue has gone away.
Method 6: Tool for Media Creation
This tool can be regarded as one of the most convenient and reliable methods of getting the update. Its operation is based on the notion of producing distinct ISOs for performing updates while maintaining original files.
The following is the last but not least method on this list:
Method 7: Using Other Software/Methods
Step 1 – In this procedure, the first step is to perform a Clean Boot on Windows before checking for updates again.
Step 2 – Next, update the drivers on your computer either manually or with software such as Driver Easy or another programme that can do this.
Step 3 – Finally, you can download the ISO files for the Windows 10 Anniversary Update.
Conclusion
This list of techniques for resolving Error 0x800705b4 can serve as a complete guide to resolving this issue, since it covers practically all of the methods that may be useful in resolving Error 0x800705b4. As a result, your PC’s performance will improve. So, in the future, whenever you encounter this type of issue, you will have nothing to worry about because you are now prepared to deal with it using the above list of several simple techniques.
The Windows Update Error Code 0x80073712 is sometimes a source of complaints. When an update is unable to complete correctly. When a file is required for the update to complete but is either missing or destroyed, this error occurs.
error
What to Do If You Get a Windows Update Error 0x80073712
There are a few options for resolving this issue. Users may entirely eliminate the Update Error 0x80073712 by following the appropriate instructions and processes.
Method 1: Use the Windows Update Troubleshooter to find out what’s wrong with your computer’s updates.
Every Windows operating system includes a built-in troubleshooter, which has proven to be quite effective in resolving a variety of issues. So, here are the actions that users can take to use the system’s troubleshooter application:
Step 1: By pressing the Windows key and then inputting the application’s name, the user can search for it. [The user must select the troubleshooting option from the control panel.]
Step 2: Next, the user must select Fix Update Problems from the System and Security menu.
Step 3: After completing the previous step, troubleshooting will begin. After solving the problem, the application would locate it and highlight it. The user must wait until the scan is completed before proceeding.
Step 4: The user must then attempt to update the window once more. They must try a new remedy if they encounter the Windows Update Error 0x80073712 again.
Method 2: Using the System Update Readiness Tool
Users aren’t always aware that they may need to utilise this app to prepare their Windows 7 device for the Windows 10 upgrade. And, on occasion, employing this instrument actually aids in the resolution of the issue.
The instructions below will assist users in doing so:
Step 1: The user must first download the tool from this link.
Step 2: The user must then run the application on their smartphone. The user must next follow the instructions displayed on the screen.
Step 3: Once the scan is completed, the user must determine whether or not their problem has been resolved.
Method 3: Use the Windows Media Creation Tool
This problem may not be resolved until the user does an in-place update. In this case, we recommend completing the in-place update with the Windows Media Creation tool. The steps below will assist you in doing so:
Step 1: The user must first download the Windows Media Creation tool programme.
Step 2: They must then accept the instructions and windows that appear.
Step 3: After that, the user must choose “Upgrade this PC Now.”
Step 4: They must then select the “Keep Personal Files” option, and then click the “Install” option in the next step.
Step 5: After that, a setup will begin, and the user must wait for it to complete. Then check to see if Error 0x80073712 is still present.
Method 4: Execute DISM
In the same way as the troubleshooting app. There are other other applications built into the system. There is a tool called Deployment Image Servicing and Management Tool among them. The programme is designed to work with Windows. And can assist in the resolution of any Windows update issues. Many people in the vicinity of the internet server said that this had also assisted them in resolving the issue.
The steps below will assist the user in implementing the solution:
Step 1: The user must press the Windows key and the X key simultaneously, and then choose Command Prompt (Admin) from the menu that appears on the window [the user can also click Start and put cmd in the box, right-click on cmd, and then choose Run As Administrator].
Step 2: When the command prompt appears, the user must type the commands below into the box:
Note: Users must exercise caution while entering these commands into their computer, since even a minor error can cause their computer or other equipment to malfunction. For a command to be implemented, the user must ensure that they press “enter” after each command. And the user must ensure that the first command has been performed before moving on to the second.
Step 3: The user must wait until all of the commands have been appropriately applied. Then they must either click on the close icon or type exit and then press Enter to leave the application.
Step 4: Finally, the user must reinstall the updates and verify whether or not the Update Error 0x80073712 has been resolved.
Method 5: Using Commands to Reset Basic Elements
These kind of issues are frequently resolved by using and typing extremely simple commands. This strategy has been employed by some users, and they have reported that it has been successful in resolving their issues.
The instructions below will also assist other users in resolving their issues:
Step 1: The user must first open the run dialogue box (they can do it by pressing Windows key and R key together).
Step 2: They must then type “cmd” into the box, then press shift control and enter simultaneously to gain administrator rights.
Step 3: The user must then type the following commands into the next window that appears:
Step 4: Once all of the commands have been entered into the device, the user must check to see if their Error Code 0x80073712 has been resolved.
Conclusion
Any of these options should hopefully assist any user in resolving the Windows Update Error 0x80073712. However, if the problem persists, it is prudent to seek assistance from the nearest service system.
Steam Missing File Privileges Error in Windows 10 is a type of error that users generally face whenever the try to update or install their steam game. The steam missing file privilege error pops up along with the path to the mentioned file. There can be some reasons due to which this error occurs, including software and hardware configuration. However, it is a minor error that can be overcome with the natural and right solutions.
7 Ways to Fix Steam Missing File Privileges Error
Here are some of the quick and best methods to fix Steam Missing File Privileges Error. Go through the article and find the best-suited solution for you.
Method 1: Stopping the igfxEm Process
The igfxEm.exe where igfxEm stands for Intel Graphics Executable Main Module. It is one of the software components included in the Intel Common User Interface. It comes as a standard package along with the installation of Microsoft Windows and its Graphics Card Driver. Moreover, this software acts as a middleware between the user and the Intel Graphics. Along with that, it also allows the user to view and adjust the characteristics of the Graphics Card Driver with the provided suitable GUI.
The exe file is not a Windows core file and is not visible; therefore, it is placed at a fixed location that is (C:\\Windows\System32\igdxEm.exe). This exe file is completely safe for your device as it is from a trustworthy site along with a signed signature. If you find this file anywhere apart from the assigned location, then it is probably a harmful malware.
Since this process is responsible for the graphics process, hence, stopping and restarting the service might resolve the error that you are facing. Follow the steps mentioned below to implement the process.
Step 1: Firstly, press the Windows key + R. Now in the run command dialog box type ‘taskmgr’ and press enter.
Step 2: In the task manager, go to the processes tab and find the igfxEm method.
Step 3: After finding it, right-click and select End the Process.
Step 4: Now, Restart your Steam Client using administrator.
Step 5: Finally, Start Downloading your Game again to check if the Steam Missing File Privileges Error error persists.
As the steam content system is divided into many different regions. Thus, your steam client automatically searches your area through your network and sets the found area as the default.
This may cause a problem sometimes, as the servers in a particular specific region may not be working correctly due to overloading, or they might be having a hardware failure. In that case, the most effective and secure method to get rid of the issue is through changing the download region.
By following the steps given below, you can implement the method.
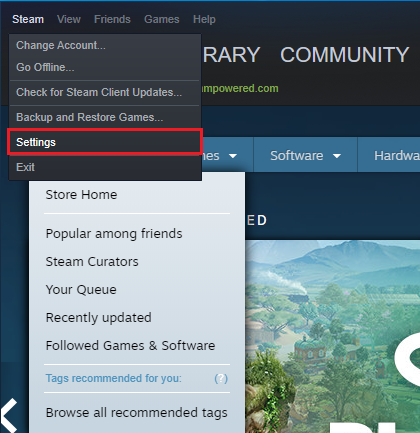
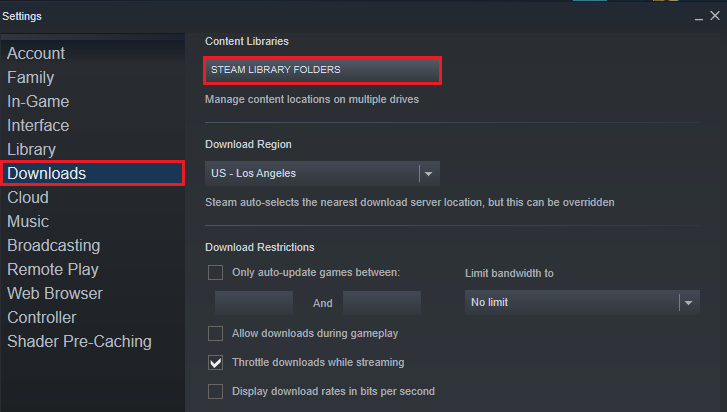
Step 1: Open your steam client. And now, from the drop-down menu in the upper left corner of the steam window, select Settings.
Step 2: Now click on the Download and then navigate to the Download Folder.
Step 3: Select any other folder from the list apart from the default ones.
Step 4: Now restart the steam again and check if the Steam Missing File Privileges Error error has resolved or not.
Method 3: Rebooting PC
When you download or update your steam game then, the software divides the data of these games into small pieces of 1MB and then assembles these pieces. It does that to avoid corrupt downloads and to save the right amount of your bandwidth.
In this process, the software is having various processes running at the same time. It might cause some technical errors in your computer system, which in turn causes the errors like Steam Missing File Privileges Error. To resolve it, the easiest way is to reboot your system and to check whether the issue has resolved or not. For further reference, make sure that you do not run any other software or program while steam is downloading to avoid any kind of interference in the process.
Method 4: Giving Administrator Privileges to Steam
If you are allowing the steam to work only in the read mode. Then it might create a problem as steam would not be able to write on the different files and hence, will get stuck while downloading or updating the program that requires writing on the system.
Therefore, to work effortlessly, steam requires to do both reads and write on your system. If not, being able to write is the reason behind the Steam Missing File Privileges Error. Then the most effective solution would be to grant steam the Administrator privilege. By following the below-given steps, you can implement the solution.
Step 1: Firstly, open your steam directory from its default location (C:\Program Files (x86)\Steam). Or if you have installed steam to any other directory, then move to that location.
Step 2: Once reached, right-click and go to Settings.
Step 3: On the properties window, go to Security Tab and click Advanced option.
Step 4: Now edit the first four-row and grant full folder control.
Step 5: To edit a row, click on the row, and then click on edit. In the new pop up window, check all the check-boxes of options, including full folder control. Now click on save changes and close.
Step 6: Finally, launch steam now by right-clicking on it and select Run as Administrator.
Method 5: Repairing the Library Folder and Verifying Its Integrity
Apart from all the other reasons, there might be a possibility that you might be using a corrupt steam Library folder which might not have been appropriately configured. It is also possible that your game files are not entirely present and missing due to some reasons.
You can try the option to Verify the Integrity of your game files. This option will help you to download and install the game files that are either missing or corrupt. You can follow the below-given steps to use the Verify Integrity Tool.
Step 1: Firstly, open Steam.exe, after that click on the steam icon at the upper left corner of the window and from the drop-down menu and select Settings.
Step 2: Now, go to the Downloads tab and click on the Steam Library Folder.
Step 3: A new window will open, displaying you a list of all the locations where steam has been installed in your system. Right-click on it and select the System Repair Library.
Step 4: After that, move to the Verify Integrity of the game files present.
Step 5: After that, exit Settings and go to your Games Library. Right-click on the missing file privileges error, causing games and choose properties.
Step 6: Navigate to the Local files tab and click on the verify integrity of game files option.
Steam will automatically verify the files present now and will download the files that are either corrupt or missing and will replace them.
Method 6: Granting Full Control to the Affected File
The error that was mentioned above can occur with the affected file in the steam directory. Therefore, you can go to the affected file directly and grant full access to it rather than issuing full permission to every file in the folder. You will get the affected file location along with the error message. So, you would not have to search for it. Follow the below-given steps for the execution of the solution.
Step 1: You can either navigate to the file location or browse the location by using the Run application.
Step 2: After you have located the file responsible for the error, follow the same steps as in method 4, to grant the full administrator privileges and access to the specific file.
Step 3: Now, restart steam and check whether the Steam Missing File Privileges error has resolved or not.
Method 7: Deleting Files in Safe Mode
After trying the above methods, if the problem still persists. Then try to delete all the game-related files, so that the Steam can download the files from the beginning without any corruption and error. After you find and note the location of your corrupt file, enter your computer in safe mode.
Safe mode ensures that all the other ongoing processes get disabled. Thus, allowing you to perform administrative actions without any interference and with much more efficiency. For further process, you can follow below given steps.
Step 1: Boot your computer in safe mode by ‘Enable Safe Mode with Networking’ option available in your Startup options.
Step 2: After that, go to the file location that you have noted before.
Step 3: After reaching the Steam apps folder, go to the Download folder and delete all the downloaded files.
Step 4: Now, restart your computer.
Step 5: Finally, launch steam using administrator access, then follow the steps in Method 5 to ‘Verify the Library and Integrity’ of the game files before re-starting your download.
Check whether the Missing File Privileges problem is solved or not.
Go through the complete article to find the best-suited solution for your problem. TheUSGuy gave you the most effective and secure methods through which you can solve the problem of Steam Missing File Privileges Error. If one method does not work out fine, then you can always try the other method. Make sure you follow all the steps carefully to attain desirable results.